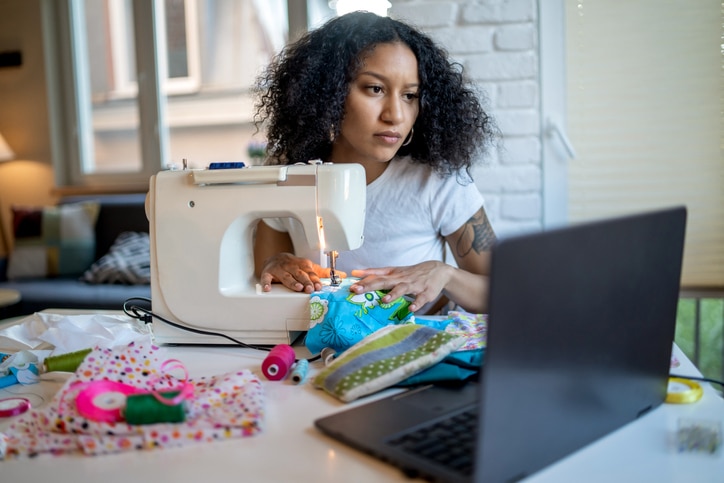
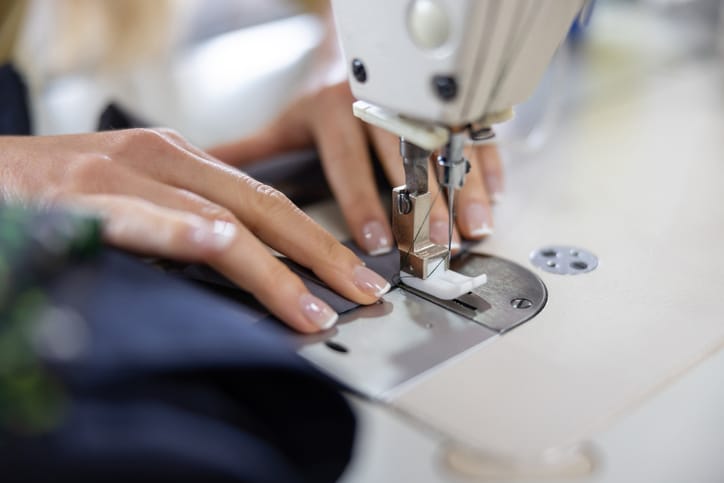
You’ve gotten yourself a new sewing machine! This tool will make all of your sewing dreams come true. However, one small step must be taken before you can embark on your sewing journey – machine setup. Each machine is different, so the information you learn about how to set up a brother sewing machine could differ from how to set up a singer sewing machine.
Setting up a sewing machine may seem daunting, especially for those new to sewing. However, with some guidance and understanding of the machine’s components, you can quickly get your sewing machine up and running smoothly.
In this article, you’ll learn the basics of how to set up a sewing machine, the importance of proper setup, and the benefits of a well-maintained sewing machine. We will provide a step-by-step guide on how to set up a sewing machine, from unpacking and assembling the machine to threading the needle and adjusting the tension. Having all the bits and gizmos in the right place will make your sewing experience much more manageable, so strap in and get your sewing machine manual out to follow along as we learn how to set up a sewing machine!
Gather the Necessary Materials for Your Sewing Machine Specifications
The first step should be to check the manual for specific requirements or instructions. The information we provide will apply to most sewing machines, but some have unique features that can add a step to the process. Keep your tools and sewing space organized for easy accessibility.
Once you’ve reviewed the machine setup instructions, it’s time to collect all the necessary tools. Here are some handy tools to have that every sewing machine setup process will need:
- Power Source: Ensure that your sewing machine is plugged into a suitable power source and that the power cord is in good condition.
- Needle: Install a sewing machine needle appropriate for your fabric and project. Consult your machine’s manual for guidance on how to insert the needle correctly.
- Presser Foot Lever: Raise and lower the presser foot using the presser foot lever. This is essential for inserting and removing fabric.
- Handy-dandy Screwdriver: A screwdriver might be the most useful tool for any sewing machine. It helps the setup process and continues its use as adjustments become necessary and threading/needle insertion arises.
The final step in preparation for the sewing machine setup is ensuring a clean, organized, and well-lit workspace. Having room to function while setting up your sewing machine makes a world of difference. Keeping your tools organized and your space clean will prevent you from misplacing necessary screws and machine parts. Ensure your workspace is well-lit so that you can see into the nooks and crannies of the machine when setting it up. A clean and well-organized workspace will also pay dividends during the sewing process.
Unboxing and Assembly
Your space is set up, and your tools are ready to go – it’s time to unbox the sewing machine! Make sure you handle the sewing machine carefully, as some loose bits could likely get lost in the machine’s mechanisms. The last thing you want when unboxing a new sewing machine is to break it before you even start setting it up.
Get everything out of the box and organized in your workspace. One tip for machine setup is to have everything visible – leaving piles of tools or parts will make searching for the next item take longer, drastically increasing the setup time. Leave yourself enough space to spread everything out so that no parts or tools are stacked on each other, and everything is readily accessible. Organize your workspace by parts so that everything is in a similar order or zone based on the steps in your sewing machine setup manual.
The actual setup of the machine itself should be pretty straightforward – most sewing machines come prebuilt, so there is no requirement for an electrical engineering degree. It can be as simple as placing the machine on a flat surface and plugging it into the power supply.
However, if there are specific instructions and steps for setup, they can be found in the instructions. Follow the steps outlined in your sewing machine manual before threading to ensure the machine is well-prepared and functioning.

Threading the Sewing Machine
Threading your machine can be daunting, but as long as you understand the thread path, it’s pretty easy! The thread path for your sewing machine will be laid out in your machine manual. The thread path typically consists of guides and tension discs guiding the thread from the spool to the needle. Consult your sewing machine’s manual to learn the specific thread path for your model. Proper threading ensures the upper thread is correctly tensioned, reducing the risk of thread breakage or uneven stitches.
After successfully threading your machine, it’s time to wind the bobbin. If your machine doesn’t have an automatic bobbin winding feature, follow these steps to wind a bobbin:
- Place an empty bobbin on the bobbin winder spindle.
- Pass the end of your thread through the bobbin’s hole and hold it with your hand.
- Engage the bobbin winder by pushing it towards the right.
- Start the sewing machine. The bobbin should wind with the thread evenly. Once it’s full, cut the thread and remove the bobbin from the winder.
To insert the bobbin, open the bobbin case or remove the cover, depending on your machine’s design. Place the wound bobbin into the case, following the arrows or guide marks. Pull the thread through the bobbin case’s slot, leaving a few inches of thread hanging. Finally, close the bobbin case or cover, ensuring it’s properly secured. This step ensures the bobbin is correctly inserted and ready for use during sewing.
Finally, you’ll want to thread the upper thread by following the thread path indicated in your sewing machine’s manual. Typically, you’ll pass the thread through the designated thread guides, ensuring it goes through the tension discs. Then, thread the needle from front to back. Make sure the thread is correctly seated in the tension discs, and leave a few inches of thread hanging from the needle. This properly prepares your sewing machine for the stitching process.
Adjusting Tension and Stitch Settings
Achieving professional sewing results relies on mastering tension and stitch settings on your sewing machine. Tension control, managed by a dial or knob, regulates stitch tightness. Lighter fabrics generally require lower tension, while heavier ones may need higher tension. Refer to your machine’s manual for recommended settings.
Stitch settings govern the type, length, and width of stitches. Most modern machines offer a range of options, from basic straight and zigzag stitches to decorative choices. Use the stitch selector dial or buttons on your machine’s control panel to select a stitch. Customize stitch length and width to fit your sewing needs, such as adjusting for different fabrics or design preferences.
Experiment with settings on scrap fabric to ensure even, balanced stitches before starting your project, and regular practice will boost your confidence in adjusting these settings for various sewing tasks.

Installing Sewing Needles and Feet
Properly installing needles and presser feet is fundamental in preparing your sewing machine for various sewing projects. Begin by selecting the appropriate sewing machine needle for your fabric and project. Check your machine’s manual for guidance on needle types and sizes. To install the needle, ensure that the flat side faces the back of the machine, insert it fully into the needle clamp, and securely tighten the needle clamp screw.
Regarding presser feet, your choice will depend on the specific sewing task. Most machines offer a range of feet, such as standard, zipper, buttonhole, and walking feet. To attach a presser foot, raise the presser foot lever to its highest position, align the presser foot’s shank with the presser foot holder, and lower the presser foot holder’s lever to secure the foot in place. Make sure it’s snugly attached before starting your project. Properly installing needles and feet ensures precise and efficient sewing, allowing you to tackle a wide range of sewing tasks confidently.
Powering On and Testing
Everything is in place – it’s time to see if it was all done correctly. Turn on the machine and see if it works! Grab a piece of scrap fabric and run a quick test stitch to see if everything functions correctly. If something feels off or the thread keeps skipping/jamming, adjust your settings to account for the problem.
If adjusting the sewing machine’s settings doesn’t fix the problems, there might have been an error in the threading or spooling steps. Don’t get discouraged, though! Troubleshooting and addressing common setup problems can be as simple as retracing your steps and finding the pain point.
Troubleshooting Common Setup Problems
Let’s look at some of the most common problems during the sewing machine setup process. These are the most likely issues causing post-setup headaches and, luckily, some simple fixes!
Incorrect Needle Placement
Inserting the needle incorrectly can lead to skipped stitches, broken needles, or fabric damage. Ensure that the flat side of the needle faces the back of the machine and that it is fully inserted and tightened.
Improper Thread Tension
Incorrect thread tension can result in loose or puckered stitches. Adjust the tension according to your machine’s recommendations for the fabric and thread you are using.
Misaligned Bobbin
If the bobbin is not correctly inserted or wound unevenly, it can cause thread jams, broken needles, or uneven stitching. Make sure the bobbin is inserted in the correct orientation and that the thread is wound smoothly.
Skipping the Thread Guides
Skipping any thread guides or tension discs in the upper thread path can lead to threading issues, poor tension, or thread breakage. Follow the thread path in your machine’s manual carefully.
Wrong Thread Size or Type
Using the wrong thread size or type for your fabric can result in stitching problems. Make sure to match the thread to your project’s requirements.
Not Raising the Presser Foot
Sewing with the presser foot down can cause fabric and thread tension issues. Always raise the presser foot before threading and sewing.
Ignoring Regular Maintenance
Neglecting to clean, oil, or maintain your sewing machine can lead to poor performance or even damage over time. Follow your machine’s maintenance schedule as outlined in the user manual.

Skipping Bobbin Tension Adjustment
If your machine allows for bobbin tension adjustment, ensure it’s set correctly. Incorrect bobbin tension can lead to issues with stitch formation.
Not Testing the Machine
Before starting your project, testing the machine’s settings on scrap fabric to check for any issues with tension, stitch length, or stitch quality is essential.
Using Dull or Damaged Needles
A dull or damaged needle can cause fabric snags, skipped stitches, or uneven seams. Change the needle regularly to maintain sewing quality.
Neglecting to Secure Loose Threads
Always hold the threads from both the upper and lower bobbins when you start sewing to prevent tangling or thread snags.
Not Threading the Bobbin Correctly
If you’re using a machine with a bobbin case, ensure that the bobbin is threaded correctly in the case and that the thread is properly guided through the tension spring.
Maintenance and Cleaning
As briefly mentioned in the previous section, regular maintenance helps preserve the efficacy of your sewing machine. Sewing machines need a little R&R, too, so don’t be stingy on the oil baths. Without proper maintenance, the sewing machine can be subject to more frequent breakdowns and threading problems.
Clean your machine after every use. A project can take a toll on your sewing machine – too many projects in a row can cause breaks and errors. Cleaning your sewing machine after every use and making sure the internal mechanisms are free from loose fabrics and spare threads helps avoid jams and clogs. Properly lubricating the sewing machine based on the manual’s guidelines will also help ensure the machine continues to function properly. Lubrication helps reduce friction and prevents common wear and tear from too much use.
And so, you’ve done it! You’ve assembled your sewing machine, learned how to follow the thread path, placed your bobbin, adjusted the setting to meet your needs, installed the needles, and placed the feet. You’re ready to start sewing. Setting up your sewing machine can be a daunting task that turns many sewists away before they even try. With proper guidance and a bit of patience, it’s one of the easiest parts of sewing!
Ready to embark on your sewing journey? Setting up your sewing machine is just the first step to unlocking your creative potential. Check out our treasure trove of sewing tips, tutorials, and inspiration. Whether you’re a seasoned seamstress or just starting, our resources will help you refine your skills, discover new projects, and find the perfect fabrics and accessories for your next creation.
